This makeup tutorial goes in the order I actually apply things: skin prep and base, then cream cheeks and eyes, then the brushes and sponges that blend it all out. It is a friendly, low-drama route to everyday makeup looks.
A Makeup Tutorial for People Who Own Too Many Brushes
Tutorials on the internet have a longer history than most people think. One beauty creator started posting on her blog in 2005 and joined YouTube in May 2007, and by 2009 and 2010 her eye tutorials had gone viral after a BuzzFeed feature. That is the mood I want in a makeup tutorial: a person, a mirror and a clear order of steps, with no pressure to buy the entire shelf.
The order is simple. Skin first, then color, then blending. A good base makes everything after it easier, so this is where I would put most of my attention.
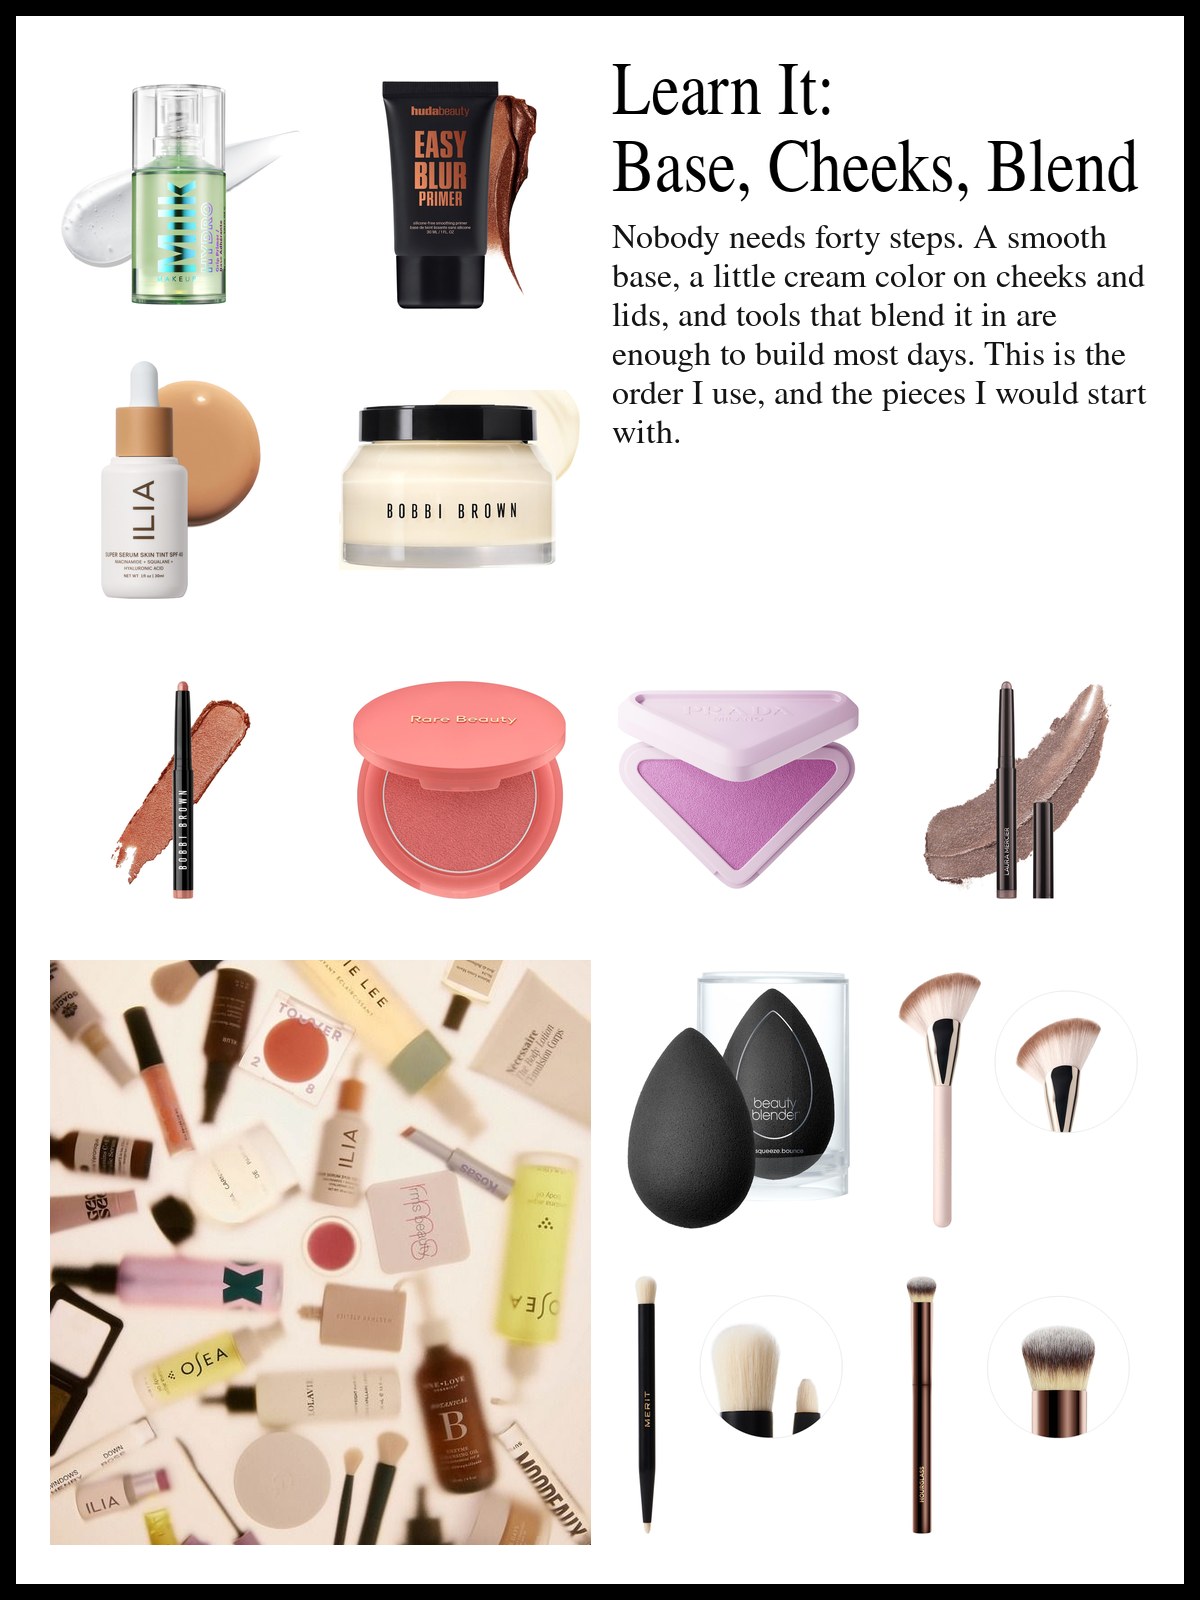
Milk Makeup's Hydro Grip is a hydrating primer with hyaluronic acid and niacinamide, made to give the makeup on top something to hold on to. Huda Beauty's Easy Blur is silicone-free and smoothing, and Benefit's POREfessional is the one to use on a nose or forehead that looks textured. Bobbi Brown's Vitamin Enriched Face Base is closer to a moisturizer and primer in one, which suits dry skin.
If you like a light finish, ILIA's Super Serum Skin Tint has SPF 40 and reads like skin with a bit of glow. Fenty Beauty's Eaze Drop is a blurring skin tint, a good match for a person who wants even skin without a full foundation.
Put a pea-sized amount of primer only where you need it, wait one minute, and then move on. Rushing that step is why base slides by lunchtime.
Base: primer, skin tint and concealer

Hydro Grip Hydrating Makeup Primer with Hyaluronic Acid + Niacinamide
Milk Makeup
$30

Easy Blur Silicone-Free Smoothing & Pore-Minimizing Primer
Huda Beauty
$30

Super Serum Skin Tint SPF 40 - Hydrating Foundation
ILIA
$48

Vitamin Enriched Face Base+ Moisturizer & Primer with Vitamin C + Hyaluronic Acid
Bobbi Brown
$115

Eaze Drop Blurring Skin Tint
Fenty Beauty by Rihanna
$41

The POREfessional Pore Minimizing Primer
Benefit Cosmetics
$36

Veil Hydrating Skin Tint in 1 Fairest with cool undertones
Hourglass
$49
&link=https%3A%2F%2Fwww.bloomingdales.com%2Fshop%2Fproduct%2Fbobbi-brown-skin-full-cover-concealer%3FID%3D4500685%26swatchColor%3DAlmond%2520%2528medium%2520brown%2520with%2520yellow%2520undertones%2529)
Skin Hydrating Full Coverage Longwear Concealer in Almond (medium brown with yellow undertones)
Bobbi Brown
$35
Cream color for cheeks and lids
Cream color is the shortcut I recommend to anyone who thinks makeup is hard. You do not need blending skill with a cream. You need a finger, a sponge or a brush, and about thirty seconds.
Rare Beauty's Soft Pinch Matte Bouncy Blush gives a soft cheek color that looks like a natural flush, and a small amount goes a long way. Tower 28's BeachPlease is a dewy cream that works on lips and cheeks, so you can use one product for both and get a matching face. Prada's Touch Cream-To-Powder Blush is a soft-blur, longwear formula that goes on as a cream and finishes like a powder, good for people who worry blush will fade by afternoon.
For eyes, sticks are the easiest way in. Bobbi Brown's Long-Wear Waterproof Cream Eyeshadow Stick and Laura Mercier's Caviar Stick both draw on in one swipe and blend with a fingertip. Armani Beauty's Eye Tint is a liquid shadow, so blend it as soon as it lands on the lid.
Always put cream on before powder, and give the base a minute to settle first. If you put powder blush first and cream over it, the cream lifts what you did. Dot color on the apple of the cheek, blend up toward the temple, and leave it there. Lids are the same: one swipe, one blend, done.
Cheeks and eyes

Long-Wear Waterproof Cream Eyeshadow Stick
Bobbi Brown
$34

Soft Pinch Matte Bouncy Blush
Rare Beauty by Selena Gomez
$27

Touch Cream-To-Powder Soft Blur Longwear Blush
Prada
$42

Caviar Stick Cream Eyeshadow
Laura Mercier
$34

BeachPlease Lip + Cheek Dewy Cream Blush
Tower 28 Beauty
$20

Eye Tint Long-Lasting Liquid Eyeshadow
Armani Beauty
$39

The Essential Cream Eyeshadow Stick in 01 Oatmilk
Estée Lauder
$32

Cream Blush Refillable Cheek & Lip Color in Anemone
Rose Inc
$32
Brushes and sponges, and how to hold them
Tools decide whether the same makeup looks smooth or patchy. I keep this part of the kit small on purpose, because a few good ones do more than a full brush roll.
The Beautyblender pro is the damp sponge that presses cream products into skin, so tint, concealer and cream blush look like they came from the skin itself. Wet it, squeeze out the extra water, and bounce it lightly instead of dragging. Hourglass's Vanish concealer brush and Haus Labs' Concealer Brush are for small, precise areas, under the eyes and around the nose, where a sponge is too big.
Rare Beauty's Angled Powder Brush and Saie's Powder Blush Brush do the blush and powder work. An angled head sits into the cheekbone and follows the shape of the face, while a fuller brush gives a wash of color. Merit's Brush No. 2 has two ends for eyeshadow: use one for laying down color, the other for blending edges.
What I would skip: washing brushes only when they look dirty, and using a dry sponge on cream, since it soaks up the product. Wash brushes about once every week or two with a mild soap, lay them flat to dry, and let sponges dry fully between uses. Clean tools blend better, and they are kinder to skin that breaks out easily.
Brushes and sponges

Beautyblender pro
Beautyblender
$20

Angled Powder Brush
Rare Beauty by Selena Gomez
$30

Brush No. 2 Double Sided Eyeshadow Brush
Merit
$20

Vanish Seamless Finish Concealer Brush
Hourglass
$42

Cruelty-Free Concealer Brush
Haus Labs
$30

The Powder Blush Brush
Saie
$30

Real Flawless Foundation Brush
Laura Mercier
$48

Ambient Powder Brush
Hourglass
$40
Putting it together in ten minutes
Here is how the whole thing runs on a normal weekday, in about ten minutes. Primer or a skin tint, concealer only where you need it, one cream blush, one eye stick, and a quick sweep of powder in the center of the face.
Do it in the same order every day and it becomes muscle memory, and you stop needing a mirror-side cheat sheet or a video playing, which is when makeup stops feeling like a task. Then when you want a bigger night look, you only add: a deeper eye stick, more blush, or a glossier lip.
Take a photo in daylight once in a while, just for yourself. It shows patchiness you will not see in a bathroom mirror, and it tells you which step to tweak. If something goes wrong, do not start over. Tap a clean sponge over the patchy spot, add a dot of cream where color went missing, and blend for a few seconds. Most mistakes disappear that way. Keep the kit small and the routine steady, and your everyday makeup looks will get better faster than you would guess.